Install NVIDIA proprietary drivers on Fedora 42
I installed Fedora Linux 42 KDE Desktop Edition on my computer recently, and the experience has mostly been great. The only thing I've had trouble with is using the proprietary NVIDIA drivers. Here's how I got them working:
Install the drivers
- Open a terminal and run this command to install all updates:
sudo dnf update -y- Reboot your computer to apply changes.
- Open a terminal and run this command to install the NVIDIA drivers:
sudo dnf install akmod-nvidia xorg-x11-drv-nvidia-cuda- Wait about five minutes for akmod to compile. If you reboot before it is finished, you'll run into problems. To check if it's done, run this command:
modinfo -F version nvidiaWhen it returns a version number, it's finished.
- Reboot your computer again to apply changes.
Using the Xorg session
If you experience issues with NVIDIA drivers on the default Wayland desktop like poor effect performance or incorrect display settings, you may want to revert to the legacy Xorg desktop.
- Install the Xorg session with this command:
sudo dnf install plasma-workspace-x11 kwin-x11- If you're using KDE Desktop Edition, tell the SDDM login manager to use X11 as well with this command:
echo "DisplayServer=x11" | sudo tee -a /etc/sddm.confImprove performance on Xorg
We're still not done. There are some performance improvements that can be made to make Plasma (or other desktop of your choice) smoother.
Disable OpenGL Flipping
OpenGL flipping allows buffer swaps to be performed by changing which buffer is scanned out rather than copying the back buffer contents to the front buffer. This generally reduces screen tearing but can cause graphical glitches.
- Open NVIDIA X Server Settings with root privileges with this command:
sudo nvidia-settings- Go to the OpenGL Settings tab and uncheck Sync to VBlank and Allow Flipping.
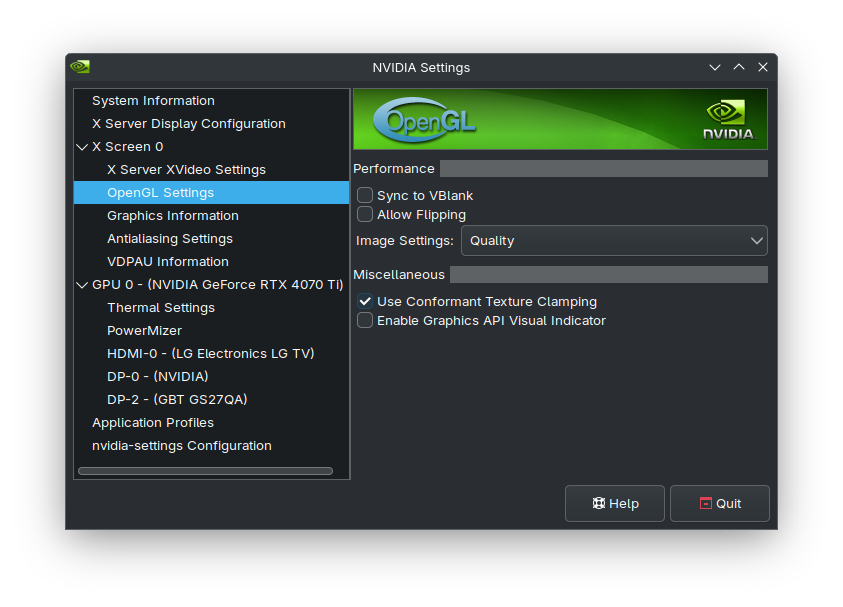
- Go to the X Server Display Configuration settings tab and click Save to X Configuration File to save changes.
- Reboot your computer to apply changes.
Disable KWin VSync and force full composition pipeline
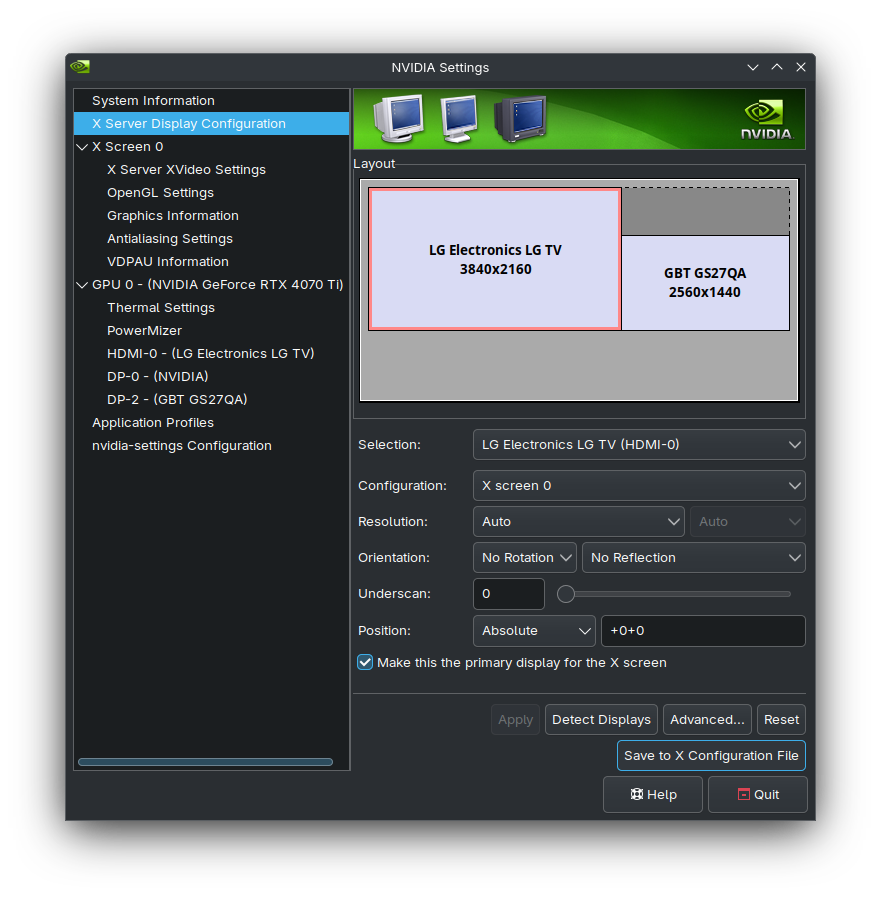
- Find the display device ID of your monitor with the highest refresh rate. You can find this in the NVIDIA X Server Settings X Server Display Configuration tab.
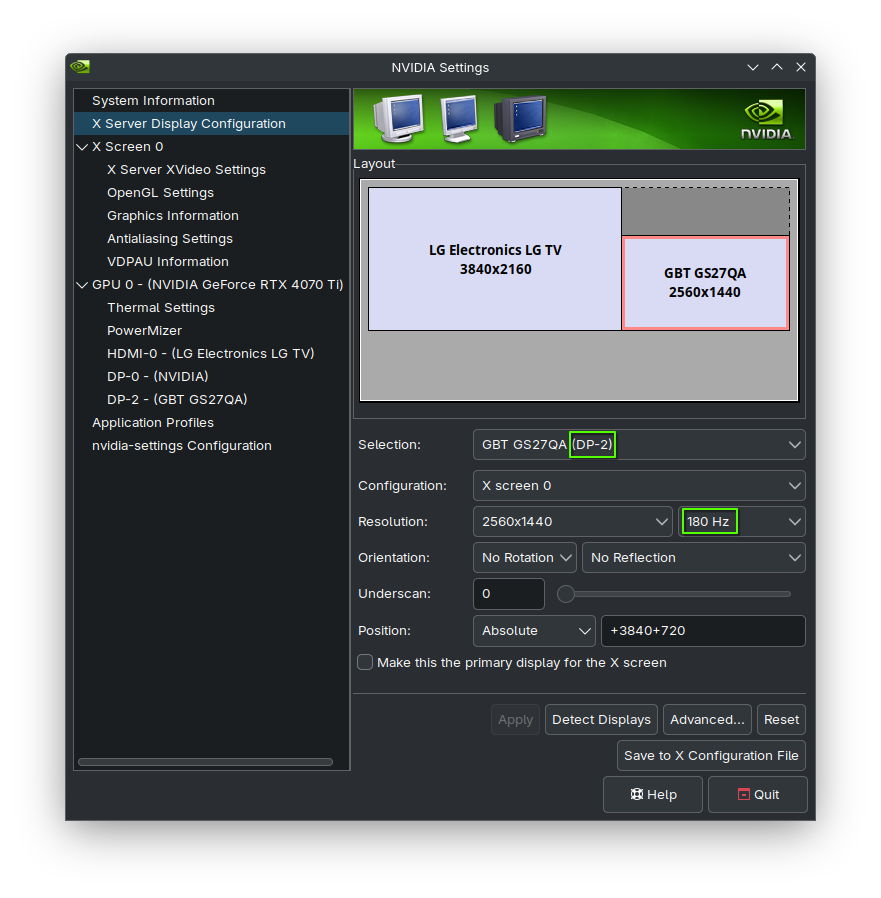
- Add NVIDIA environment variables using this command. Replace "DP-2" with the display device ID you found in step 1.
echo "__GL_SYNC_DISPLAY_DEVICE=DP-2
VDPAU_NVIDIA_SYNC_DISPLAY_DEVICE=DP-2" | sudo tee -a /etc/environment- Add KWin environment variables using this command. The KWIN_X11_REFRESH_RATE should be the refresh rate of your fastest monitor multiplied by 100. In my case, this is 180000.
echo "KWIN_X11_REFRESH_RATE=180000
KWIN_X11_NO_SYNC_TO_VBLANK=1
KWIN_X11_FORCE_SOFTWARE_VSYNC=1" | sudo tee -a /etc/environment- Open NVIDIA X Server Settings with root privileges:
sudo nvidia-settings- Go to the X Server Display Configuration tab, select your fastest monitor, and click Advanced...
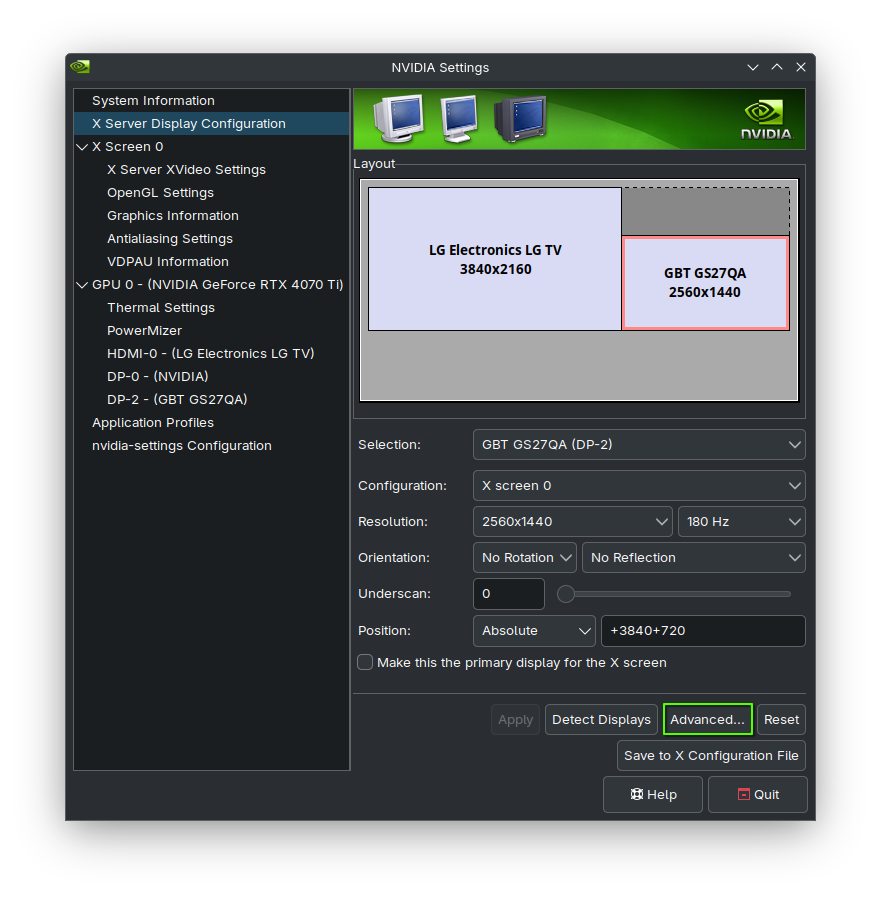
- Enable Force Composition Pipeline and Force Full Composition Pipeline.
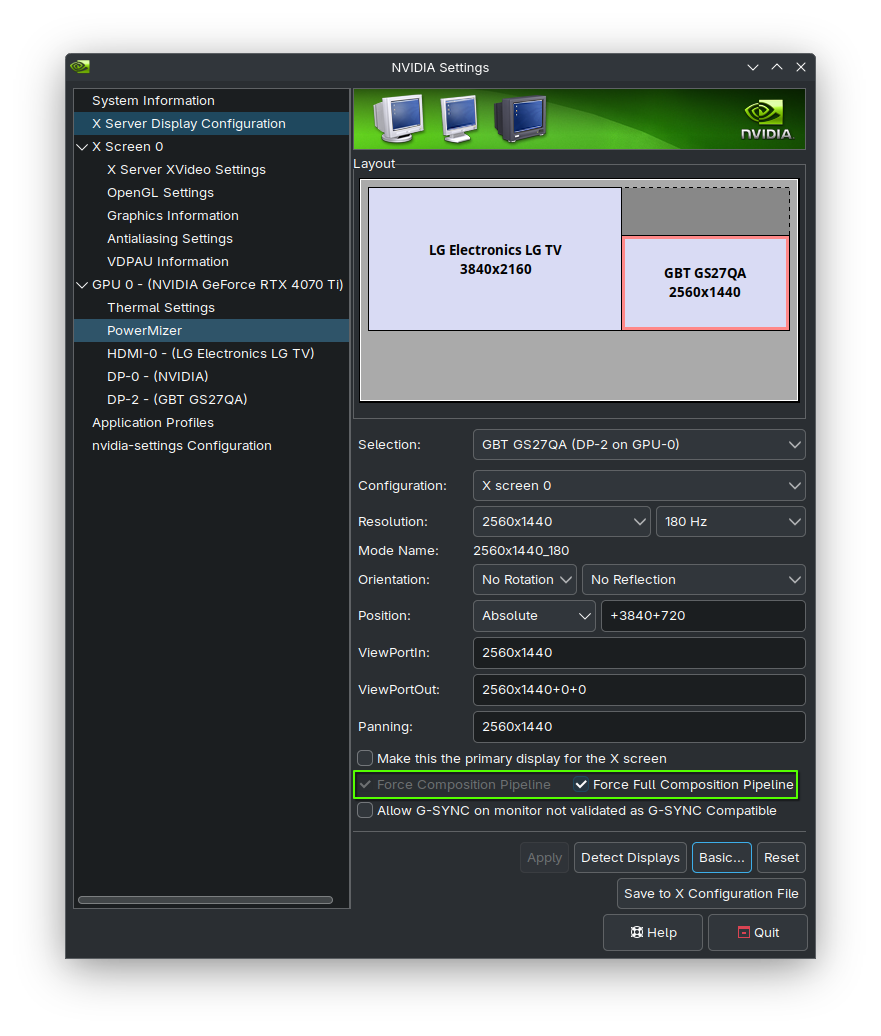
- Click Save to X Configuration File to save changes.
- Reboot your computer to apply changes.
I hope this helps you!

Member discussion